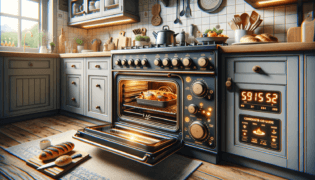


Discover the world of culinary possibilities that your General Electric appliance has to offer with our comprehensive guide to GE Oven Settings. In this blog post, we’ll delve into the various options and features that enable you to achieve perfect results every time you cook in your GE oven. Join us in exploring the numerous functions, controls, and modes of this versatile kitchen essential, designed to take your home cooking to the next level.
Modern GE ovens come with a variety of customizable settings, modes, and types to optimize your cooking experience. Below, we have compiled a list of the most essential oven settings you should know.
Understanding oven settings can significantly impact the quality and efficiency of your cooking. Here are some helpful tips from Settings King, a blog about technology settings, designed to make the most of your oven settings.
Convection modes, such as convection bake or convection roast, are critical for achieving even cooking results thanks to the fan-assisted circulation of hot air. Switching to convection mode can reduce cooking time by up to 25%, saving both time and energy.
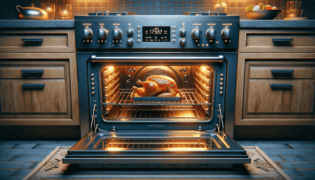
When using the temperature probe feature, ensure that the probe is placed at the thickest part of the meat and away from bone, fat, or gristle. This will guarantee accurate temperature readings, helping you achieve the perfect cook on your meats.
For homemade bread enthusiasts, make full use of the proofing setting for optimal dough rise. Once the dough has doubled in size, switch to the bake setting for a perfectly golden crust and a soft, tender interior.
The delay start feature can be a game-changer for busy cooks. Before heading out for the day, prepare your oven and set the delay start to ensure your meal is cooked and ready for you when you return.
With Settings King by your side and our expert advice on oven settings, your culinary creations are sure to impress. Unlock your kitchen’s potential by mastering oven settings and taking your cooking to the next level.
When it comes to oven settings, many misconceptions can hinder the effectiveness of your cooking. At Settings King, we’re here to debunk some of these myths and expand your understanding of oven settings.
While this might be tempting, higher temperatures don’t always equate to faster cooking. In fact, it may cause uneven cooking or overcooking on the outside while leaving the inside undercooked. Stick to recommended temperatures in recipe instructions for optimal results.
In reality, proper oven rack placement is crucial for achieving the desired cooking outcome. The top rack is best for browning and broiling, the middle rack suits most baking needs, and the bottom rack is ideal for slow, even cooking.
Skipping preheating can lead to longer cooking times and uneven results, making this step essential for precise cooking. Always preheat your oven for a better finished dish.
At Settings King, our mission is to help simplify the technical aspect of your home cooking adventure. By mastering GE oven settings and incorporating the information provided in this blog, you can achieve consistently delicious and impressive results in your kitchen. Armed with the knowledge of technology settings from Settings King, there’s no limit to the culinary masterpieces you can create. Happy cooking!
We understand that readers may have additional questions after reading our blog post on GE oven settings. To assist you further, we’ve compiled a list of frequently asked questions, along with concise, NLP-style answers to address your concerns.
For baking cakes, it’s best to use the conventional bake mode at the temperature recommended by the recipe, typically between 325°F to 375°F (160°C to 190°C). Ensure proper rack placement and preheat the oven before starting the baking process.
While convection mode can be useful for various cooking tasks, broiling is not an ideal application. Instead, use the dedicated broil mode for tasks like searing meats, browning, or melting cheese with direct and intense heat.
Utilize the self-cleaning feature when you notice significant buildup or residue inside your oven. Generally, it’s recommended to perform a self-cleaning cycle every few months or as needed, depending on how frequently the oven is used.
Insert the temperature probe into the thickest part of the meat you’re cooking, avoiding bone, fat, or gristle. This will ensure accurate temperature readings and help you gauge when your dish is perfectly cooked.
When using the Warm & Hold setting, you do not need to switch off the oven. The oven will maintain a low temperature to keep your food warm without overcooking it. Once you’re ready to serve, simply turn off the oven.