
Welcome to our latest blog post, ‘How to Set the Timer on a Whirlpool Oven’! In this guide, we’ll be taking you through the simple steps to efficiently set and manage your Whirlpool oven timer, ensuring perfectly cooked meals every time. Whether you’re a seasoned chef or new to the world of cooking, our step-by-step instructions will help you get the most out of your appliance.
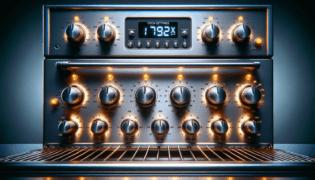
Locate the ‘Timer’ or ‘Clock’ button on your Whirlpool oven’s control panel.
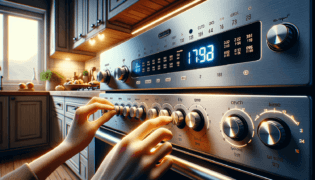
Press and hold the ‘Timer’ or ‘Clock’ button for 3 seconds. The display will flash, indicating that the timer is ready to be set.
Use the ‘+’ and ‘-‘ buttons to adjust the timer to the desired duration. As you press these buttons, the displayed time will increase or decrease in one-minute increments.
For longer than an hour, continue pressing the ‘+’ button until the display shows the desired hours and minutes. You can also hold down the ‘+’ or ‘-‘ buttons for faster scrolling through the time settings.
Once you’ve set the desired duration, release the ‘+’ or ‘-‘ buttons and wait for a few seconds. The timer will automatically start counting down, and a small clock icon will appear on the display, indicating that the timer is active.
When the timer reaches zero, the oven will beep to notify you that the set time has elapsed. Press the ‘Timer’ or ‘Clock’ button again to reset the timer or to set a new duration.
Getting the most out of your Whirlpool oven involves understanding how to set and use its timer function properly. By following this guide, you’ll learn how to set the timer on your Whirlpool oven easily and precisely, ensuring perfectly cooked meals every time.
Find the ‘Timer’ or ‘Clock’ button on your Whirlpool oven’s control panel. This button may be labeled differently depending on your specific oven model. Familiarize yourself with the button so you can easily access it when needed.
Press and hold the ‘Timer’ or ‘Clock’ button for 3 seconds. The display will flash, signaling that the timer is now in setting mode and ready for the desired duration to be input.
Use the ‘+’ and ‘-‘ buttons to increase or decrease the timer duration. The displayed time will change in increments of one minute. Continue pressing the ‘+’ button for longer durations until the display shows the desired hours and minutes. To scroll through the time settings more quickly, you can hold down the ‘+’ or ‘-‘ buttons instead of pressing them repeatedly.
If you need to set the timer for a specific time, follow the same process but use the buttons to set the clock to the exact time required. Be sure to observe the format (AM/PM) if applicable to your oven model.
Once you have input the desired timer duration, release the ‘+’ or ‘-‘ buttons and wait for a few seconds. The timer will automatically begin counting down from the set duration, and a small clock icon will appear on the display to indicate that the timer function is active.
When the timer reaches zero, the oven will emit a beep to indicate that the set time has elapsed. You can press the ‘Timer’ or ‘Clock’ button to reset the timer or input a new time for your next cooking task.
Delay Start allows users to set the oven to start cooking at a predetermined time in the future. Open oven settings, locate “Delay Start” or a similar option, input desired start time, then select “Start” or confirm.
Press the “Clock” or “Time” button, adjust hours and minutes using arrow or number keys, and confirm by pressing “Start” or “Enter.”
Always preheat your oven before baking or roasting to ensure that your food cooks accurately and evenly.
Regularly check the progress of your food while it cooks to avoid over or undercooking.
Adjust the temperature according to the type of food you are cooking, as each dish may require unique temperature settings.
It’s essential to familiarize yourself with the various timer functions on your Whirlpool oven. In addition to the basic timer function discussed in this blog post, many Whirlpool ovens offer advanced features such as delayed start, cook time, and other specialized cooking modes. These functions can enhance your overall cooking experience, and as a ‘Settings King’ reader, we want you to harness the full potential of your oven.
Using the timer on your Whirlpool oven ensures that you don’t overcook or undercook your meals. It’s an indispensable tool to make your life easier, especially when multitasking in the kitchen. The timer allows you to focus on other tasks while knowing that your oven will alert you when it’s time to check on your food.
At ‘Settings King’, we believe that understanding the settings on your various devices – including your Whirlpool oven – can significantly enhance your overall experience and satisfaction. Be sure to explore the other features and functions available on your oven, such as convection cooking, broil and roast modes, and the Sabbath mode, among others. Knowing how to use these settings properly can lead to more consistent and precise cooking results.
Maintaining your oven is key to ensuring it operates efficiently and reliably. Cleaning your oven regularly, checking the door seal for wear and tear, and replacing the oven light as needed are all essential steps in maintaining your appliance. Regular maintenance also enables your Whirlpool oven to operate more effectively, using energy efficiently and benefiting the environment.
As a blog that specializes in technology settings, ‘Settings King’ is committed to providing you with accurate and easy-to-follow tips and tricks to optimize the performance of your devices. Whether you’re setting the timer on your Whirlpool oven, configuring the settings on your smartphone, or adjusting your smart home devices, ‘Settings King’ is here to help make the process as seamless as possible. Stay updated with our latest content and find out how your everyday technology can empower you!
After reading our blog post on setting the timer on a Whirlpool oven, you may have some questions on the topic. In this FAQ section, we address some common inquiries to provide a better understanding of the timer functionality and related features on your Whirlpool oven.
Yes, some Whirlpool oven models allow you to set the timer to a specific time. To do this, enter the timer setting mode, but instead of inputting the desired duration, use the ‘+’ and ‘-‘ buttons to set the exact time required. Ensure you observe the correct AM/PM format if applicable to your oven model.
Yes, many Whirlpool ovens offer a delayed start function, which allows you to program the oven to start cooking at a later time. Refer to your oven’s user manual for specific instructions on how to set up the delay start feature on your particular model.
While most Whirlpool ovens follow a similar process for setting the timer, there may be slight variations depending on your oven model. Consult your oven’s user manual or the manufacturer’s website to confirm the specific timer setting instructions for your particular oven.
If your timer is not working correctly, first check the oven’s power supply and ensure no other issues are affecting its performance. If the problem persists, it may be advisable to contact Whirlpool’s customer support or a qualified technician for troubleshooting assistance, as the timer may need repair or replacement.
Yes, you can use the timer function while cooking multiple dishes in your Whirlpool oven. However, be aware that different dishes may have different cooking times and temperatures, so consider using a separate kitchen timer or other timekeeping method to keep track of each dish’s individual cooking requirements.