

Welcome to our step-by-step guide on setting the clock on your Whirlpool Gold Series Oven! This handy tutorial will help you navigate through the various buttons and features, ensuring that your oven stays up to date with the correct time, enabling accurate and efficient cooking. Let’s dive into the simple process of syncing your oven’s clock with the current time!
1. Locate the ‘Clock’ button: On the control panel of your Whirlpool Gold Series Oven, find the button labeled ‘Clock’ or displaying a clock icon.
2. Hold down the ‘Clock’ button: Press and hold the ‘Clock’ button for a few seconds until the display starts blinking. This indicates that the clock setting mode is now active.
3. Adjust the hours: Use the ‘+ (plus)’ or ‘- (minus)’ buttons to set the correct hour value. Press either button to change the value one digit at a time, or hold the button down for faster adjustments.
4. Set the minutes: Once the correct hour is set, press ‘Start’ or ‘Clock’ again to move to the minutes setting. The minutes will start blinking, indicating it’s ready for adjustment.
5. Adjust the minutes: Similar to setting the hours, use the ‘+ (plus)’ or ‘- (minus)’ buttons to set the correct minute value. Press either button to change the value one digit at a time, or hold the button down for faster adjustments.
6. Finalize the time setting: After setting the correct time, press the ‘Start’ or ‘Clock’ button one more time to save and exit the clock setting mode. Your oven’s clock is now set to the current time.
Keeping your oven’s clock up-to-date is essential for accurate and efficient cooking. In this blog post, we’ll guide you through the process of setting the clock on your Whirlpool Gold Series Oven in just a few straightforward steps.
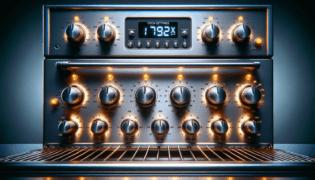
To set the clock on your Whirlpool Gold Series Oven, you’ll need to familiarize yourself with the following control panel buttons:
With the control panel buttons in mind, here’s a detailed step-by-step guide on setting your Whirlpool Gold Series Oven’s clock:
Press and hold the ‘Clock’ button for a few seconds until the oven’s display starts blinking. The blinking indicates that the clock setting mode is active.
Using the ‘+ (plus)’ or ‘- (minus)’ buttons, set the correct hour value for your oven’s clock. To change the value, press either button for individual digit increments or hold the button down for faster adjustments.
Once you’ve set the hour value, press the ‘Start’ or ‘Clock’ button again to move to the minutes setting. The minutes will blink, indicating they’re ready for adjustment.
Like the procedure for the hours, use the ‘+ (plus)’ or ‘- (minus)’ buttons to adjust the minutes to the correct value. Press the buttons for individual digit increments or hold them down for quicker adjustments.
Having adjusted both the hour and minute values, press the ‘Start’ or ‘Clock’ button one last time to finalize and save the time setting. This action will exit the clock setting mode, and your Whirlpool Gold Series Oven’s clock will now display the current time.
Following these simple steps, you can easily set the clock on your Whirlpool Gold Series Oven, ensuring that you have a functioning, timely, and efficient cooking process.
As a Whirlpool Gold Series Oven owner, you’ll benefit from a few supplementary tips and tricks from Settings King, your go-to blog for all your technology settings needs.
When daylight saving time rolls around, you may need to make a one-hour adjustment to your oven’s clock. Using the steps provided in the ‘How to Set Clock on Whirlpool Gold Series Oven’ blog post, you can easily make these adjustments and ensure your oven is always set to the correct time.
Keep in mind that many recipes call for time-sensitive cooking procedures. By keeping your oven’s clock up-to-date, you’ll be well-prepared to follow time-sensitive cooking instructions accurately. Settings King is here to ensure you have access to the necessary insights and information to master your appliance controls.
If you happen to encounter any issues or difficulties while setting the clock on your Whirlpool Gold Series Oven, consult your oven’s user manual. Often, you’ll find comprehensive troubleshooting guides and instructions provided by the appliance manufacturer. Additionally, feel free to browse the Settings King blog for more helpful articles on appliance settings and tips.
If you found this article helpful, don’t forget to subscribe to the Settings King blog for more useful guides and tips to master the settings on various appliances. Our blog is full of expert advice designed to save you time and streamline your device experiences!
We understand that you may have some questions after reading our blog post on setting the clock on a Whirlpool Gold Series Oven. To help you out, we’ve compiled a list of common questions and provided straightforward answers for your convenience.
In some cases, the ‘Clock’ button might have a different symbol or label, such as a clock icon or ‘Time’. If you’re unsure, consult the user manual for your specific oven model, as it should contain instructions specific to your appliance.
You can reset the clock by following the same steps outlined in the blog post. Simply hold down the ‘Clock’ button until the display blinks, make the necessary adjustments, and then save the changes using the ‘Start’ button.
Some Whirlpool Gold Series Oven models may allow you to switch between 12-hour and 24-hour clock formats. Consult your specific oven’s user manual for instructions on how to change the clock format, as different models may have varying procedures.
If your oven clock isn’t saving the time, you may be experiencing an issue with the oven’s control board or electrical components. In this case, refer to your oven’s troubleshooting guide within the user manual or contact a professional technician or Whirlpool’s customer service for assistance.
If your Whirlpool Gold Series Oven clock loses time, it could be due to a faulty control board. While you can try resetting the clock by following the steps in our blog post, for persistent issues, we recommend contacting a professional technician or contacting Whirlpool’s customer service for further assistance.